Access all In Easy Steps books for just £5 a month
Menu
See also: Using Apple Pay
Apple Pay is Apple’s service for mobile, contactless payment. It can be used by adding credit, debit and store cards to your iPhone 6s, via the Wallet app, and then paying for items by using your Touch ID fingerprint as authorization for payment. Credit, debit and store cards have to be issued by banks or retailers who support Apple Pay, but there are an increasing number that do so, with more joining on a regular basis. Outlets also have to support Apple Pay but this too is increasing and, given the success of the iPhone, is likely to grow at a steady rate.

At the time of printing, Apple Pay is only available in the US, UK, Canada and Australia. In the UK there is a limit of £30 for in-store purchases, but there is no such limit in the US, Canada or Australia.
To use Apple Pay you have to add your cards to your iPhone 6s:
Step 1
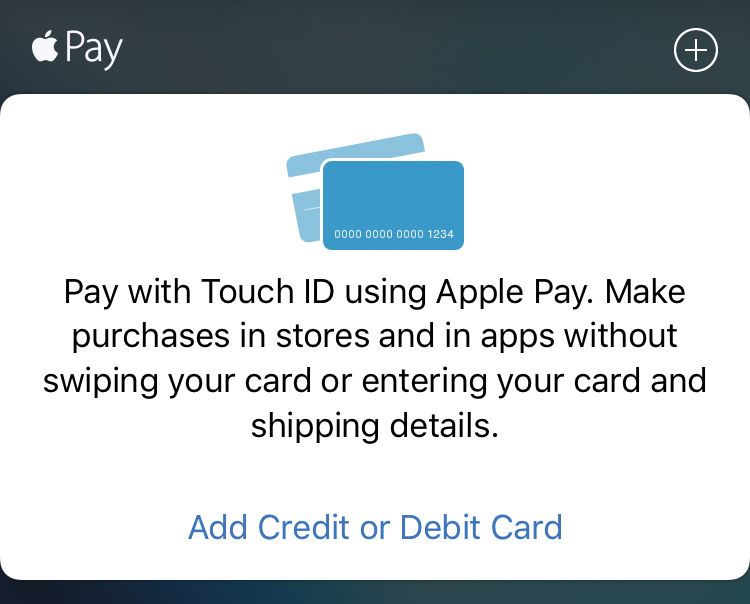
Tap once on the Wallet app
Step 2
Tap once on the Add Credit or Debit Card link or tap once on this button

Step 3
Tap once on the Next button
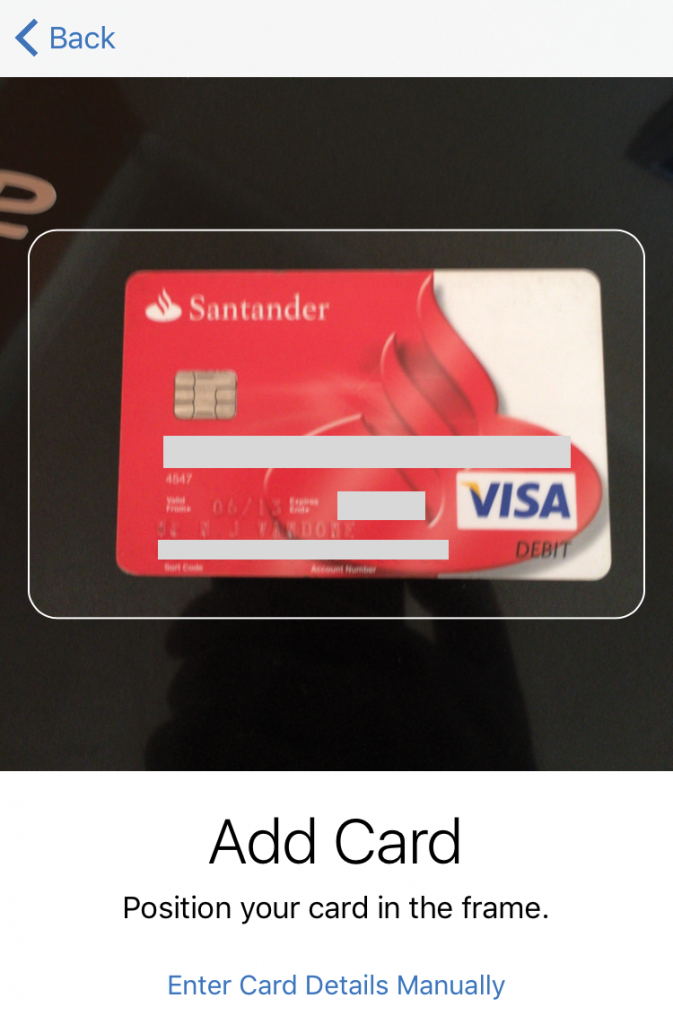
Step 4
The card details can be added to the Wallet by taking a photo of the card. Place the card on a flat surface and position it within the white box. The card number is then added automatically. Alternatively, tap once on the Enter Card Details Manually link
 Step 5
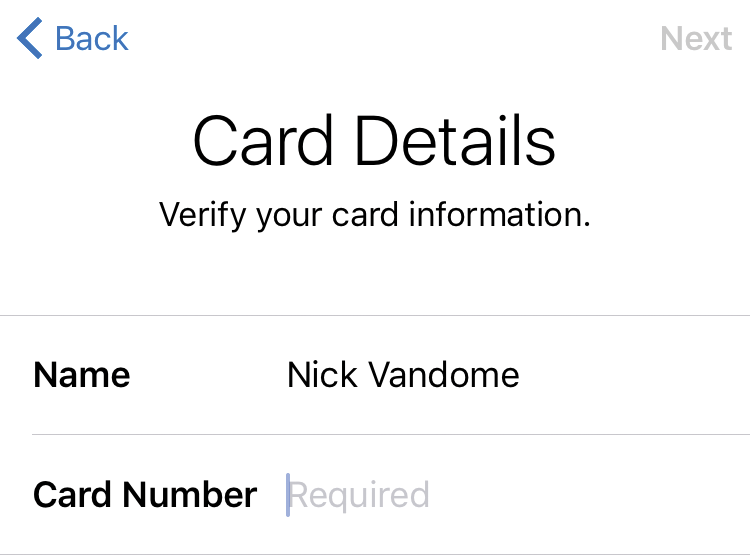
Tap once on the Next button to verify your card details (ensure the name is exactly the same as it appears on the card)
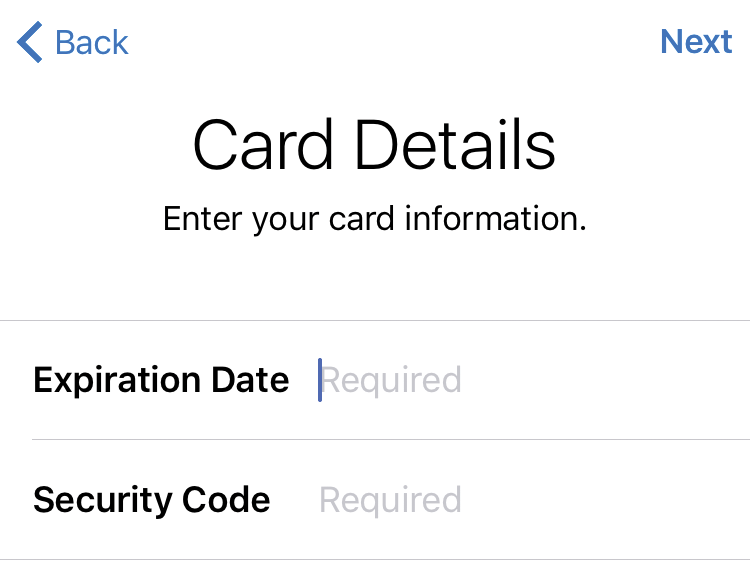
Step 6
Add any additional details for the card (such as expiration date and the security code) and tap once on the Next (If the card has already been registered for use on iTunes, the details will be shown here.)
Step 7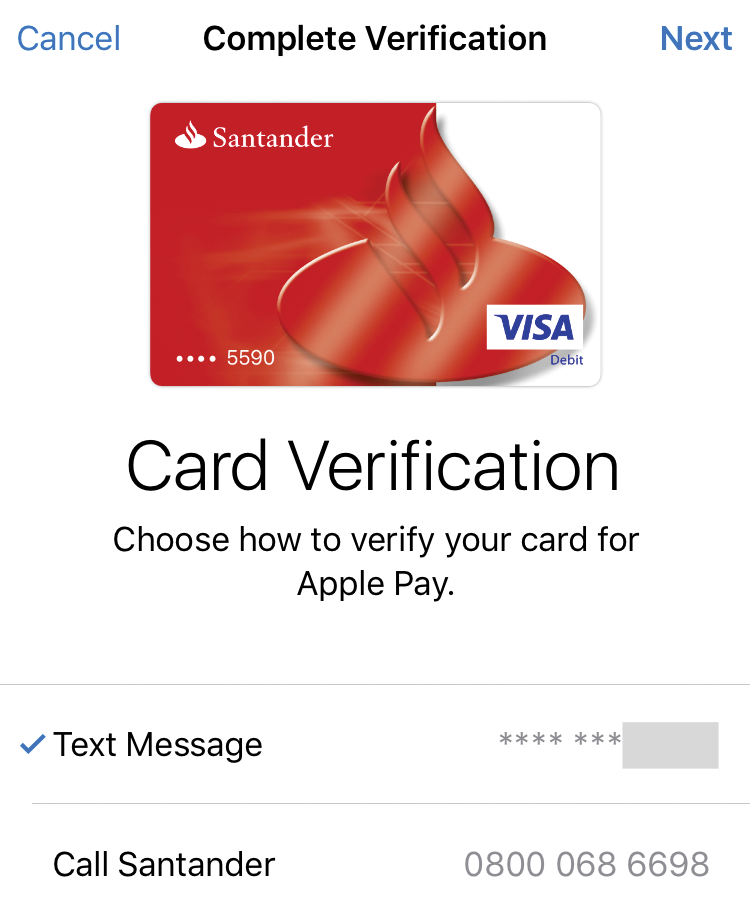
Before you can use Apple Pay, your bank or store card issuer has to verify your card. This can be done either by a text message or a phone call. Select the preferred method and tap once on the Next button
Step 8
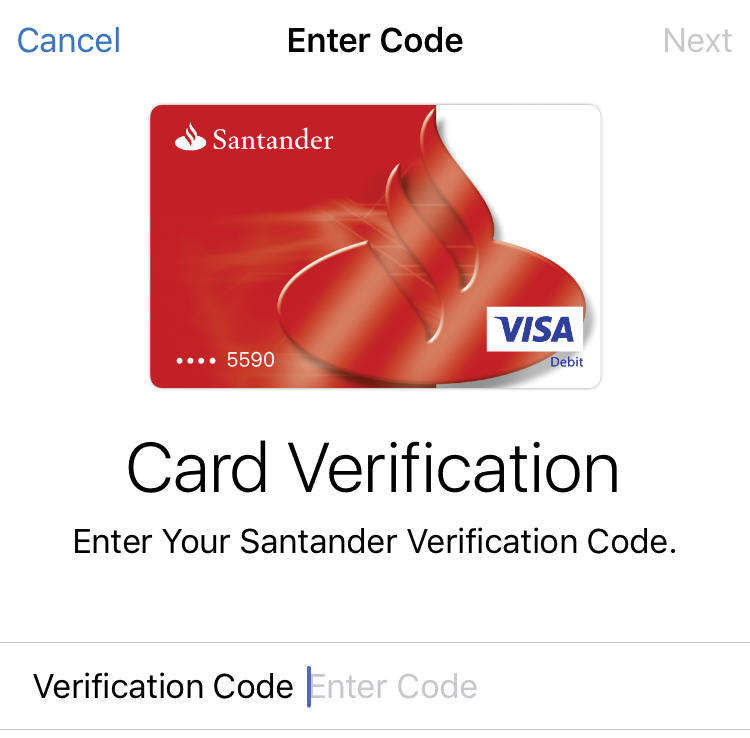
If you selected to verify your card with a text message in Step 7, you will be sent a code to verify your card. Enter this, and tap once on the Next Once this has been done, the card will be activated. Tap once on the Done button on the Card Activated screen
Step 9
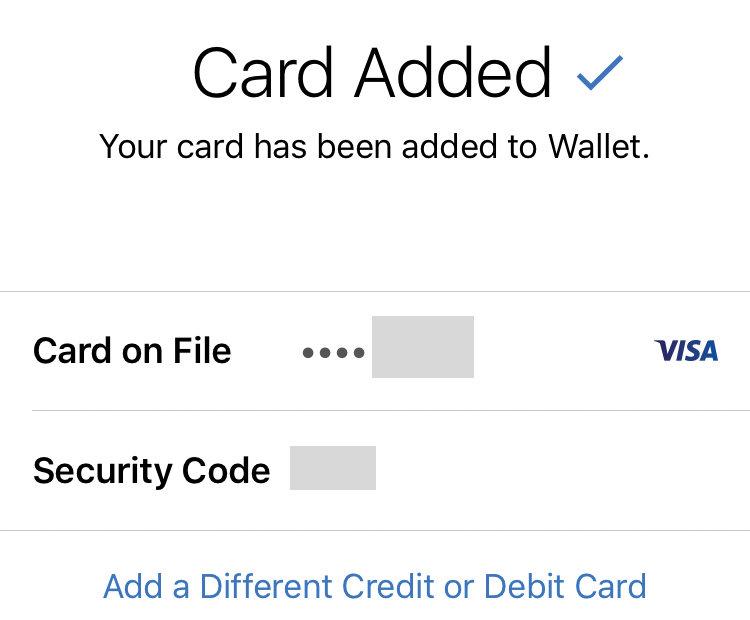
Details of the card that has been added to the Wallet are displayed. This will be visible when you open the Wallet app, ready for use with Apple Pay

If your bank does not yet support Apple Pay then you will not be able to add your credit or debit card details into the Wallet app.
… and it’s as easy as that!
For the complete iPhone guide covering iOS 9 and the iPhone 6s and 6s Plus, all in the trusted In Easy Steps style, click here. In full-colour and straightforward, jargon-free language, iPhone in easy steps gives you all the information you need to get up and running with your new iPhone 6s or 6s Plus, so you will quickly feel in control of it!
See also: Using Apple Pay