Access all In Easy Steps books for just £5 a month
Menu
Are you searching for an easy and fast way to split the window on your Windows 11 device?
Split screen has become a popular feature since its creation, allowing people to divide up their screen into several sections for different applications. This helps save time and make multitasking much easier. With Windows 11, Microsoft gives users even more options for how to customize their screen with multiple app views.
This guide – taken from Windows 11 for Seniors – will discuss everything you need to know about how to split screen in Windows 11. You’ll learn how to quickly and accurately split the screen and arrange your apps. Let’s dive in!
1) Start with several apps open, as windows on the desktop, or as full-screen.
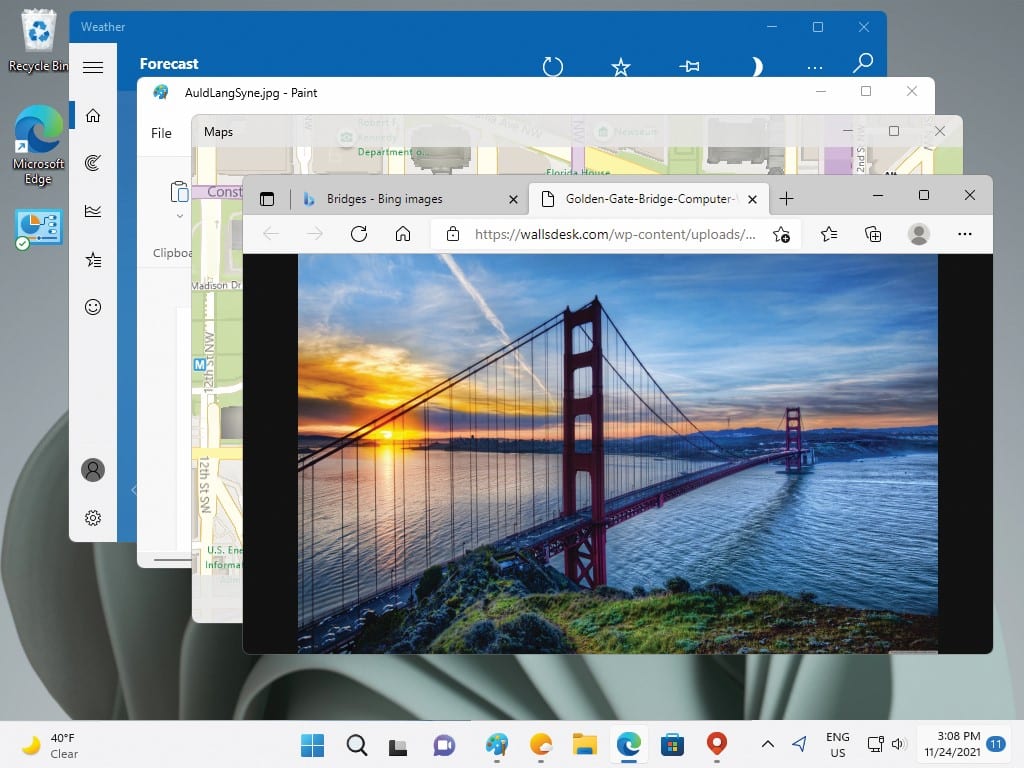
Here, we have four apps open, the most that are usually set to share the screen and be viewed at the same time.
2) Click the Title bar on one app and drag it to the side of the screen, and release the mouse button when a frame appears showing the new location.

You can select an app and press WinKey + Left arrow or WinKey + Right arrow to split the screen, then select a second app for the other half.
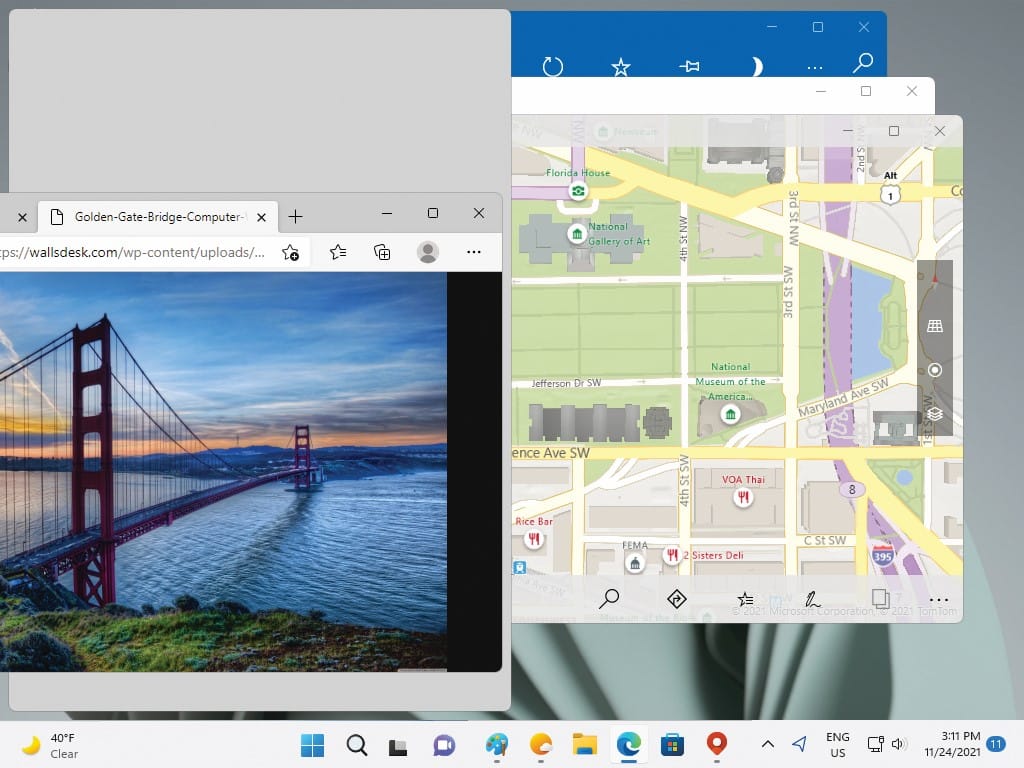
3) The other apps are displayed in Task View style on the other half of the screen. Select an app to be displayed in that half.
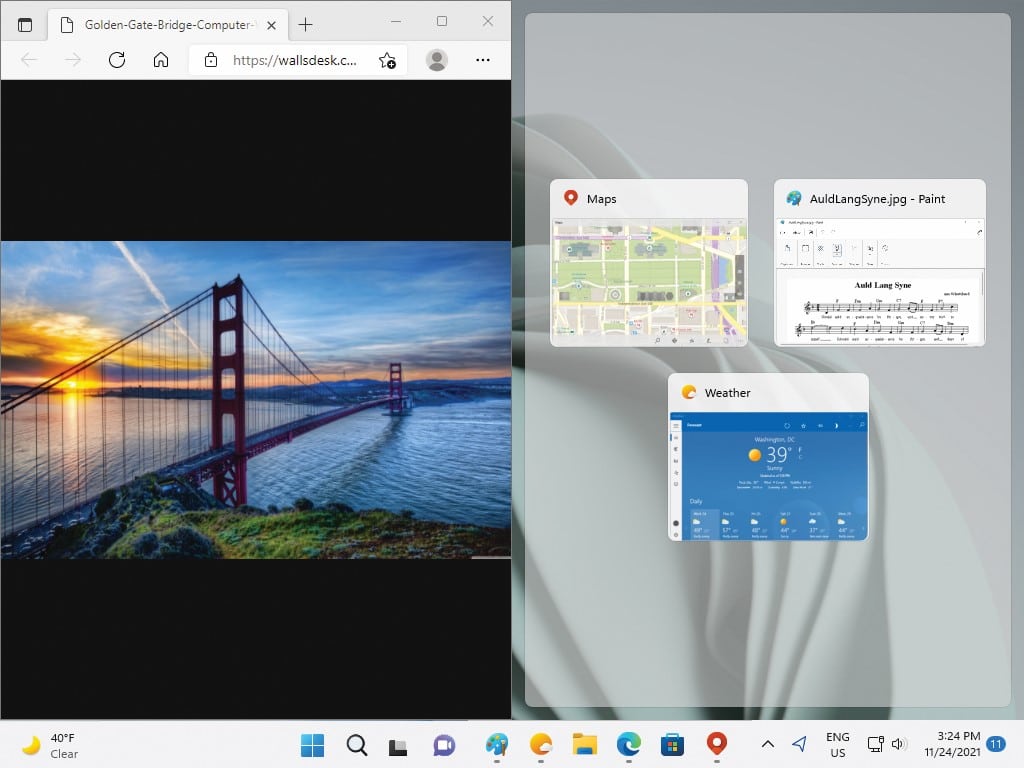
Click and drag the edges of a windowed app to resize it on the screen.
With two apps displayed side by side, click and drag the edge between them to widen one window and narrow the other.
4) To arrange four apps on the screen, click on the Title bar of each app in turn and drag it to a corner.

If you have a dual-monitor system, you can have sets of two or more apps displayed on each monitor.

You can position apps in corners using the keyboard. Press WinKey + Left arrow then Up arrow for the upper-left corner. 

Your active apps can be automatically arranged using the Snap Layouts feature. The options offered depend on the display resolution of your screen.
1) Hover the mouse pointer over the Maximize icon at the right of the Title bar.

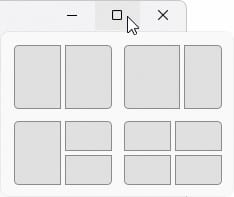
With a maximum screen resolution of 1920 x 1080 or higher, and with Landscape orientation, you will be offered these six arrangements:
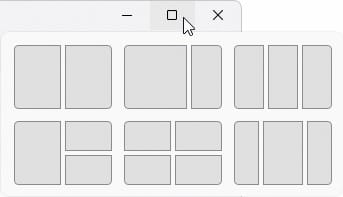
With a lower maximum screen resolution, you’ll be given four arrangements to choose from:
2) Click your desired positioning, and the currently selected app will be moved to that location.
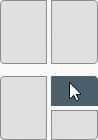
3) You will then be able to select which of your active apps to place in each of the other locations in your chosen arrangement.
You can also press the WinKey + Z key combination to display the Snap Layouts feature.
If you have set Portrait rather than Landscape, you’ll be offered top-to-bottom-stacked windows.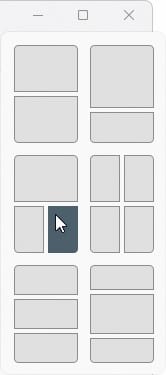

By: Nick Vandome
ISBN: 9781840789331
£11.99
