Access all In Easy Steps books for just £5 a month
Menu

RAW images are those in which the digital data has not been processed in any way, or converted into any specific file format, by the camera when they were captured. These produce high quality images and are usually available on higher specification digital cameras. However, RAW is becoming more common in consumer digital cameras and they can be downloaded in Elements in the same way as any other image. Once the RAW images are accessed, the Camera Raw dialog box opens so that a variety of editing functions can be applied to the image. RAW images act as a digital negative and have to be saved into another format before they can be used in the conventional way.
To edit RAW images:
Step 1
Open a RAW image in the Editor or from the Organizer
Step 2
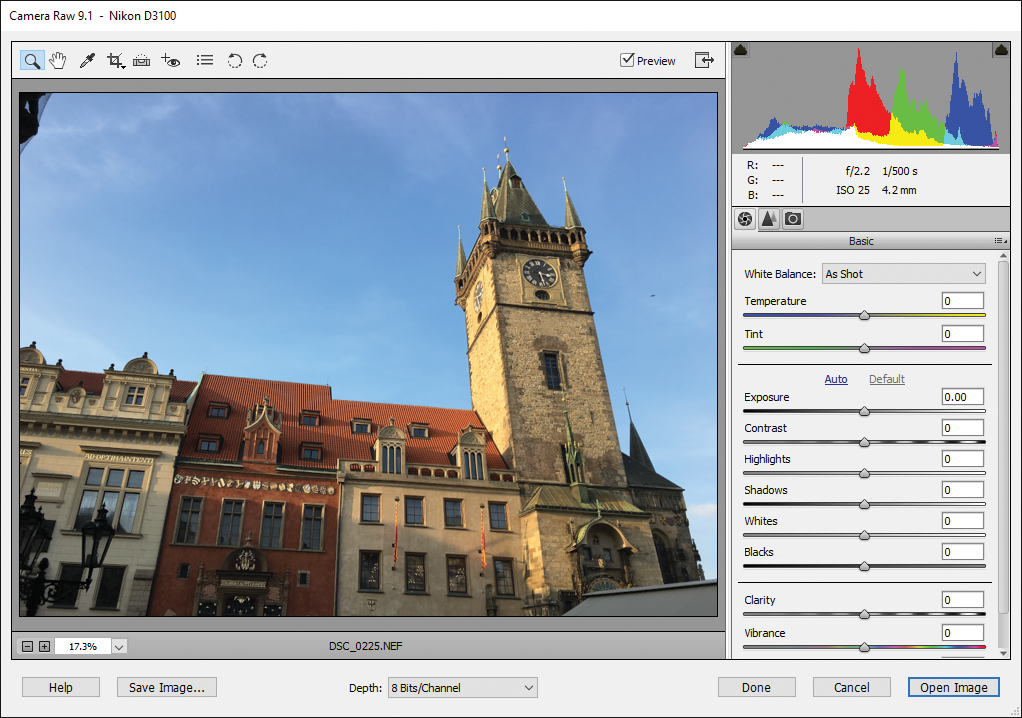
In the Camera Raw dialog box, editing functions that are usually performed when an image is captured can be made manually

Step 3
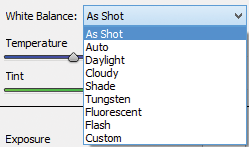
Click here to adjust the White Balance in the image
Step 4
Drag these sliders to adjust the Color Temperature and Tint in the image


All images can be open in RAW by using the File > Open in Camera Raw command from the Menu bar.
Step 5
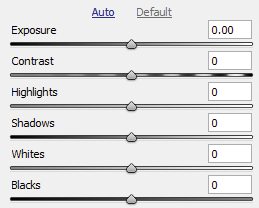
Drag these sliders to adjust the Exposure, Contrast, Highlights, Shadows, Whites and Blacks in the image
Step 6
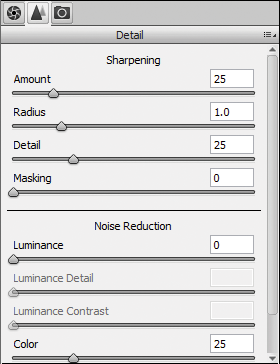
Click on the Detail tab and drag these sliders to adjust the Sharpness and Noise in the image![]()
The Sharpness of an image refers to the contrast between adjoining pixels and can contribute to an image appearing more sharply in focus.
The Noise in an image refers to pixels that have not captured color accurately (mainly in low-level lighting) and can make images look ‘speckled’. Noise Reduction in the RAW window can help reduce this, by dragging the available sliders.
Step 7
Click on the Open Image button. This opens the image in Expert edit mode, from where it can also be saved as a standard file format, such as JPEG![]()
… and it’s as easy as that!
For the complete guide to Photoshop Elements 14, all in the trusted In Easy Steps style, click here.
Photoshop Elements 14 Tips, Tricks and Shortcuts in easy steps not only offers a comprehensive guide to getting up and running with the software, but goes further: providing a wealth of detail in ways to progress to more advanced photo-editing and even revealing some hidden secrets!