Access all In Easy Steps books for just £5 a month
Menu
The Photos app also has a section where the best of your photos are selected and displayed automatically. To use this:
Step 1
Tap once on the Memories button on the bottom toolbar


Step 2
The Photos app automatically collates photos into groups of memories, based on criteria such as location, people, Best of the Year, and Best of Last 3 Months. Tap once on a memory to view the photos within it


Step 3
The Photos app selects the best photos for each memory and displays them on the page. Swipe down the page to view the photos. It also creates a movie (slideshow) with music. Tap once here to view the movie

Step 4
The Memories movie shows the photos in a variety of formats to give an attractive display

Step 5
Tap once on a movie as it is playing to view and scroll through the timeline at the bottom of the screen, the pause/play button, and also settings to customize the slideshow, including removing and adding photos to it

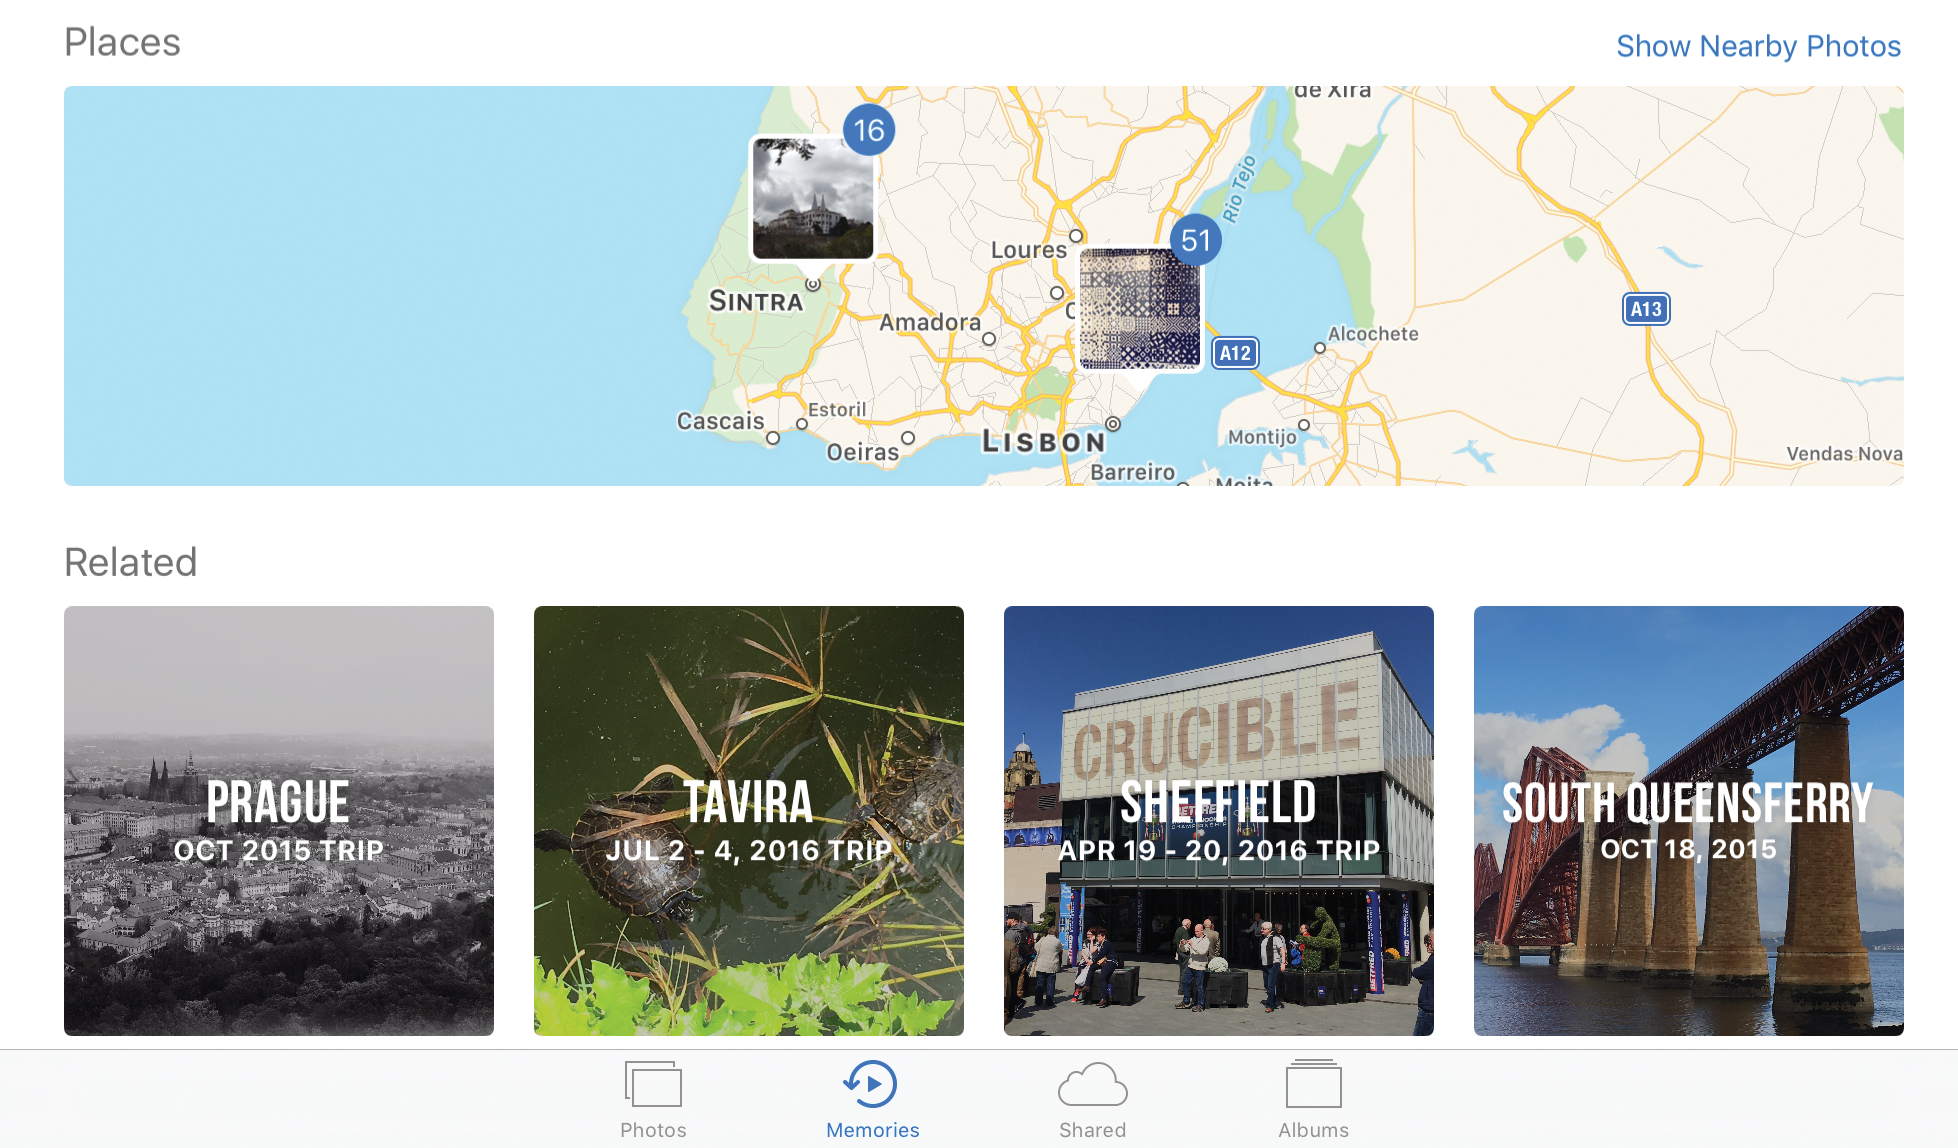
Step 6
Swipe down to the bottom of the memory in Step 3 to view a map with the locations of the photos and also related memories, based on locations and people

Options for customizing a Memories movie include the style, which determines the title style and transitions between photos, the overall speed of the movie, and the background music.
Tap once on this button at the righthand side of the panel in Step 5 to access more Settings for a movie, including editing the title, adding music and adding more photos.

For the complete guide to the Apple iPad, in the trusted In Easy Steps style, click here. Whether you’re upgrading to iOS 10 from a previous version or using it for the very first time, iPad for Seniors in easy steps, 6th edition will guide you through the key features so you’ll be a pro in no time at all!