Access all In Easy Steps books for just £5 a month
Menu
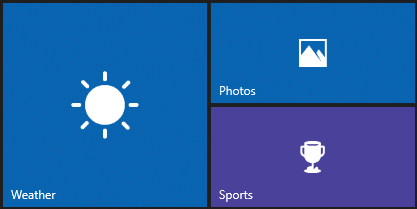
As well as rearranging tiles, their sizes can also be edited on the Start Menu. Depending on the Windows app, there may be up to four options for resizing tiles in Windows 10: wide, large, medium and small, with the initial selection made for you:
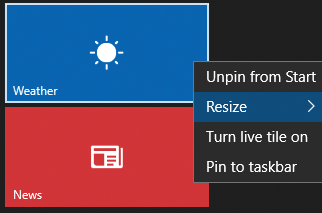
Step 1
Right-click on a tile to select it and click on the Resize button
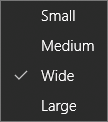
Step 2
The current size of the tile is shown with a tick next to it
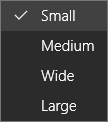
Step 3
Click on another option to resize the tile
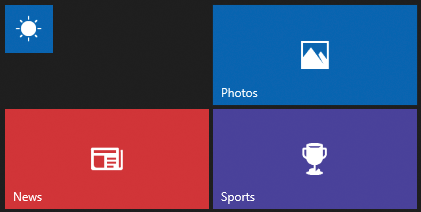
Step 4
If the size is smaller, the tile is reduced in size and a gap appears next to it (unless there is another tile small enough to fill the space next to it)
Step 5
For a wide tile, there will be options for making it Large, Medium or Small
Step 6
The Large size is the biggest available option for resizing tiles. Tiles that have been resized can be moved around the Start Menu and other tiles will move automatically to accommodate them


Step 7
Creating a range of different tile sizes is a good way to organize the Start Menu and create a good mixture from a design point of view

The Large size is a good option for a tile that can then be used as a live tile to display its contents or real-time information.
For the complete guide to Windows 10, all in the trusted In Easy Steps style, click here. Whether you’re upgrading to Windows 10 from a previous version or using it for the very first time, Windows 10 in easy steps will guide you through the key features so you’ll be a pro in no time at all!